0 Comments

In AngularJS services can be used to share state across multiple views and controllers. This can be useful for several reasons. It can allow the application to go between views without having to wait on web requests to go get the data again from the server.  Another useful benefit is to allow 2 controllers to share the same data. For example if you add an item in an editing controller you may want to see that change reflected in a summary chart at the same time.


As an example imagine an application that allows a user to design a donut with the toppings and dough flavor they select. To maintain the state of the user’s selections an AngularJS service will be used. To identify which donut the user is creating a donutId will be stored in the $state AngularJS service. The application also has a service that provides access the web API for the donut application.


The first thing to do is create the service and inject the dependencies:

(function (DonutApplication) {
'use strict';
DonutApplication.Services.factory('donutStateService', ['$state', '$q', 'donutApiService',
function ($state, $q, donutApiService) {

}]);
})(DonutApplication);


The service is named “donutStateService” and has dependencies on the $state and $q AngularJS services and the donutApiService.


The first thing to do in the service is define the model that will contain the state:

var vm = {
toppings: [],
dough: null
};


It is important to always return this model from the service and not the individual contents of it. The reason is that an object must be shared in order for changes to be reflected. If a variable is shared then the controller will only get a copy of the value rather than a reference to it.

The next step is to create variables to represent the API resources needed and the current donutId loaded into the service’s model:

var toppingsResource = donutApiService.toppingsResource();
var doughResource = donutApiService.doughResource();

var curDonutId = 0;


Add methods to populate the model from the API:

function getToppings() {
var defer = $q.defer();
toppingsResource.query({ donutId: curDonutId }, {},
function (data) {
vm.toppings = data;
defer.resolve(data);
});
return defer.promise;
}

function getDough() {
var defer = $q.defer();
doughResource.query({ donutId: curDonutId }, {},
function (data){
vm.dough = data;
defer.resolve(data);
});
return defer.promise;
}


Create a method to check the $state’s donutId against the donutId loaded into the service’s model. If they do not match then the Id should be updated and the model should be refreshed from the API. The items in the model are initialized individually because resetting the vm would cause any consumers’ references to be broken.

function resetIfDonutChanged() {
var defer = $q.defer();
if (curDonutId !== $state.params["donutId"]) {
curDonutId = $state.params["donutId"];
vm.toppings = [];
vm.dough = null;

$q.all(
getToppings(),
getDough()
)
.then(function () {
defer.resolve();
});
} else {
defer.resolve();
}
return defer.promise;
}


The caller of the donutStateService should get a promise back to allow the state service to update the model from the API if necessary. In order to simplify this a helper function is useful:

function returnPromisedValues(values) {
var defer = $q.defer();
resetIfDonutChanged().then(function () {
defer.resolve(values);
});
return defer.promise;
}


Finally create the return object of the donutStateService and return the model wrapped in a promise:

return {
getDonutInfo: function () {
return returnPromisedValues(vm);
}
};


To use the donutStateService in a controller you could set a variable on the scope to the object returned by the getDonutInfo method:

$scope.vm.donutDetails = donutStateService.getDonutInfo();


By accessing the state service in this way across multiple controllers changes made in one controller will be reflected in the other. This is a simple, but useful pattern to speed up and simplify an AngularJS application that needs to share state across multiple views.
0 Comments

When using Entity Framework for a project I needed to be able to mock the database context and sets in order to do unit testing. I was able to find some ways to mock the Entity Framework context, but I did not find a complete solution. Most examples did not take into account setting the identity column or deleting items. In order to handle these scenarios I created my own MockDbSet.

I will demonstrate how this works with a sample project for creating and editing reminders.


The context is represented by a simple interface:

public interface IRemindersContext
{
IDbSet<Reminder> Reminders { get; set; }

Task<int> SaveChangesAsync();
}


The business logic is in a manager class that takes the context interface as a parameter to enable dependency injection and unit testing:

public class ReminderManager : IReminderManager
{
IRemindersContext _context;
public ReminderManager(IRemindersContext context)
{
_context = context;
}

public List<Reminder> Get()
{
return _context.Reminders.ToList();
}

public Reminder Get(int reminderId)
{
return _context.Reminders.Find(reminderId);
}

public async Task<Reminder> Add(string description)
{
var reminder = new Reminder { Description = description };

_context.Reminders.Add(reminder);

await _context.SaveChangesAsync();

return reminder;
}

public async Task<bool> Delete(int reminderId)
{
var reminder = _context.Reminders.Find(reminderId);

_context.Reminders.Remove(reminder);

var result = await _context.SaveChangesAsync();

return result > 0;
}
}


In order to do unit testing of the business logic I need to be able to mock the IDbSet. This is where my mock class comes in. I am using Moq to do create the mocks. The mock IDbSet will be created by a static method on a static class. The method will accept a generic list containing the data that should be returned by the mock IDbSet. The class and method look like this:

public static class MockDbSet
{
public static Mock<IDbSet<T>> CreateMockDbSet<T>(List<T> data) where T : class
{
...
}
}


The first thing I need to do is to set up the mock to behave like an IQueryable<T>. To do this I will create the mock object mock some of the IQueryable methods.

var mock = new Mock<IDbSet<T>>();
var queryData = data.AsQueryable();
mock.As<IQueryable<T>>().Setup(m => m.Provider).Returns(queryData.Provider);
mock.As<IQueryable<T>>().Setup(m => m.Expression).Returns(queryData.Expression);
mock.As<IQueryable<T>>().Setup(m => m.ElementType).Returns(queryData.ElementType);
mock.As<IQueryable<T>>().Setup(m => m.GetEnumerator()).Returns(queryData.GetEnumerator());


This is all that is needed in order to create a mock that will allow you to select items from it. I want to have add and remove functionality so I need to add those methods to my mock. First, I will find the primary key by using the class name with the suffix “Id”.

Type type = typeof(T);
string colName = type.Name + "Id";
var pk = type.GetProperty(colName);
if (pk == null)
{
colName = type.Name + "ID";
pk = type.GetProperty(colName);
}

Note: Before using the pk you must validate that it is not null.


Now that I have the primary key and I create a method to add new items to the mock IDbSet and return them with the new ID. My implementation supports integer and Guid primary keys.

mock.Setup(x => x.Add(It.IsAny<T>())).Returns((T x) =>
{
if (pk.PropertyType == typeof(int)
|| pk.PropertyType == typeof(Int32))
{
var max = data.Select(d => (int)pk.GetValue(d)).Max();
pk.SetValue(x, max + 1);
}
else if (pk.PropertyType == typeof(Guid))
{
pk.SetValue(x, Guid.NewGuid());
}
data.Add(x);
return x;
});


The code for remove is much simpler:

mock.Setup(x => x.Remove(It.IsAny<T>())).Returns((T x) =>
{
data.Remove(x);
return x;
});


I also need to support Find for my application. This turns out to be the trickiest method to implement. The difficult part is determining the primary key column and using it in a LINQ statement. I already know the primary key column so I will reuse that variable to write the query to find the item. To do this I create an expression tree to build the lambda expression that matches the given value to the primary key.

mock.Setup(x => x.Find(It.IsAny<object[]>())).Returns((object[] id) =>
{
var param = Expression.Parameter(type, "t");
var col = Expression.Property(param, colName);
var body = Expression.Equal(col, Expression.Constant(id[0]));
var lambda = Expression.Lambda<Func<T, bool>>(body, param);
return queryData.FirstOrDefault(lambda);
});


Here is the complete code for the MockDbSet:

public static class MockDbSet
{
public static Mock<IDbSet<T>> CreateMockDbSet<T>(List<T> data) where T : class
{
var mock = new Mock<IDbSet<T>>();
var queryData = data.AsQueryable();
mock.As<IQueryable<T>>().Setup(m => m.Provider).Returns(queryData.Provider);
mock.As<IQueryable<T>>().Setup(m => m.Expression).Returns(queryData.Expression);
mock.As<IQueryable<T>>().Setup(m => m.ElementType).Returns(queryData.ElementType);
mock.As<IQueryable<T>>().Setup(m => m.GetEnumerator()).Returns(queryData.GetEnumerator());

Type type = typeof(T);
string colName = type.Name + "Id";
var pk = type.GetProperty(colName);
if (pk == null)
{
colName = type.Name + "ID";
pk = type.GetProperty(colName);
}
if (pk != null)
{
mock.Setup(x => x.Add(It.IsAny<T>())).Returns((T x) =>
{
if (pk.PropertyType == typeof(int)
|| pk.PropertyType == typeof(Int32))
{
var max = data.Select(d => (int)pk.GetValue(d)).Max();
pk.SetValue(x, max + 1);
}
else if (pk.PropertyType == typeof(Guid))
{
pk.SetValue(x, Guid.NewGuid());
}
data.Add(x);
return x;
});
mock.Setup(x => x.Remove(It.IsAny<T>())).Returns((T x) =>
{
data.Remove(x);
return x;
});
mock.Setup(x => x.Find(It.IsAny<object[]>())).Returns((object[] id) =>
{
var param = Expression.Parameter(type, "t");
var col = Expression.Property(param, colName);
var body = Expression.Equal(col, Expression.Constant(id[0]));
var lambda = Expression.Lambda<Func<T, bool>>(body, param);
return queryData.FirstOrDefault(lambda);
});
}

return mock;
}
}


In order to use this in unit tests I will create a mock context class that I can create an instance of for each unit test.

public static class RemindersContextMock
{
public static Mock<IRemindersContext> GetMockContext()
{
var context = new Mock<IRemindersContext>();

context.Setup(c => c.Reminders).Returns(GetReminders().Object);

return context;
}

public static Mock<IDbSet<Reminder>> GetReminders()
{
var reminders = new List<Reminder>
{
new Reminder { ReminderId = 1, Description = "Do work" },
new Reminder { ReminderId = 2, Description = "Read a book" },
new Reminder { ReminderId = 3, Description = "Make dinner" }
};

return MockDbSet.CreateMockDbSet<Reminder>(reminders);
}
}

I will create a setup method for my unit tests where I create the instance of the manager class to test and pass in my mocked context.

ReminderManager _manager;
Mock<IRemindersContext> _context;

[SetUp]
public void SetUp()
{
_context = RemindersContextMock.GetMockContext();

_manager = new ReminderManager(_context.Object);
}

Now I can write tests for the methods in the manager class. First I will verify that I can get the list of reminders from the context.

[Test]
public void CanGetReminders()
{
var reminders = _manager.Get();
Assert.AreEqual(3, reminders.Count());
}

Next I will verify that when I add a reminder it gets a valid ID.

[Test]
public async Task CanAddReminder()
{
var reminder = await _manager.Add("Walk the dog");
Assert.AreEqual(4, reminder.ReminderId);
}

Finally I will test the remove method to ensure that it is removing the reminder from the context.

[Test]
public async Task CanDeleteReminder()
{
var reminder = _manager.Get().FirstOrDefault(r => r.Description == "Read a book");
await _manager.Delete(reminder.ReminderId);
var reminder2 = _manager.Get(reminder.ReminderId);
Assert.IsNull(reminder2);
}

I hope this helps you if you need to create a mock IDbSet. It should be clear now how to add to the mock DbSet’s methods if you need additional functionality.

0 Comments

Sometimes I need to do the same thing repeatedly as a part of my normal work tasks. For example, if I need to query a database using a list of strings I might need to escape all the strings in the list. LINQPad allows me to easily write some C# to do that and save the code to use again later. I will demonstrate this using my example of preparing a list of strings for a database query.

I might be given this list of ingredients and I need to use them in a SQL query.

flour

vinegar

eggs

sugar

cornmeal

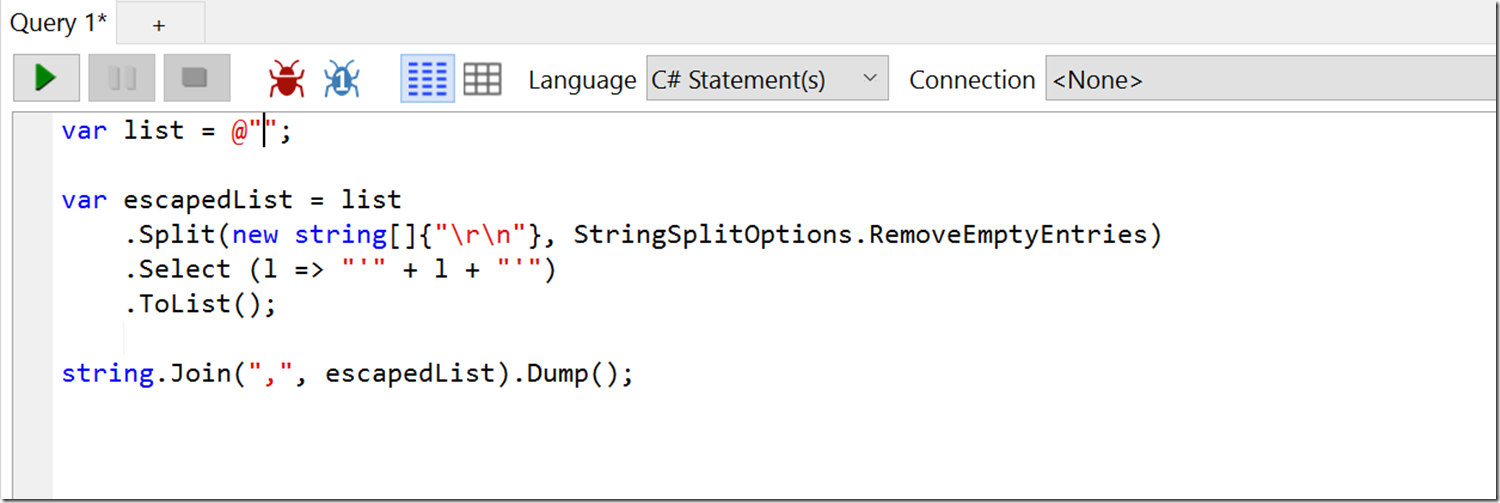
I can write some C# code in LINQPad to take a string, split it at each newline, then combine it separating the values with commas.

StringToSQLINQuery

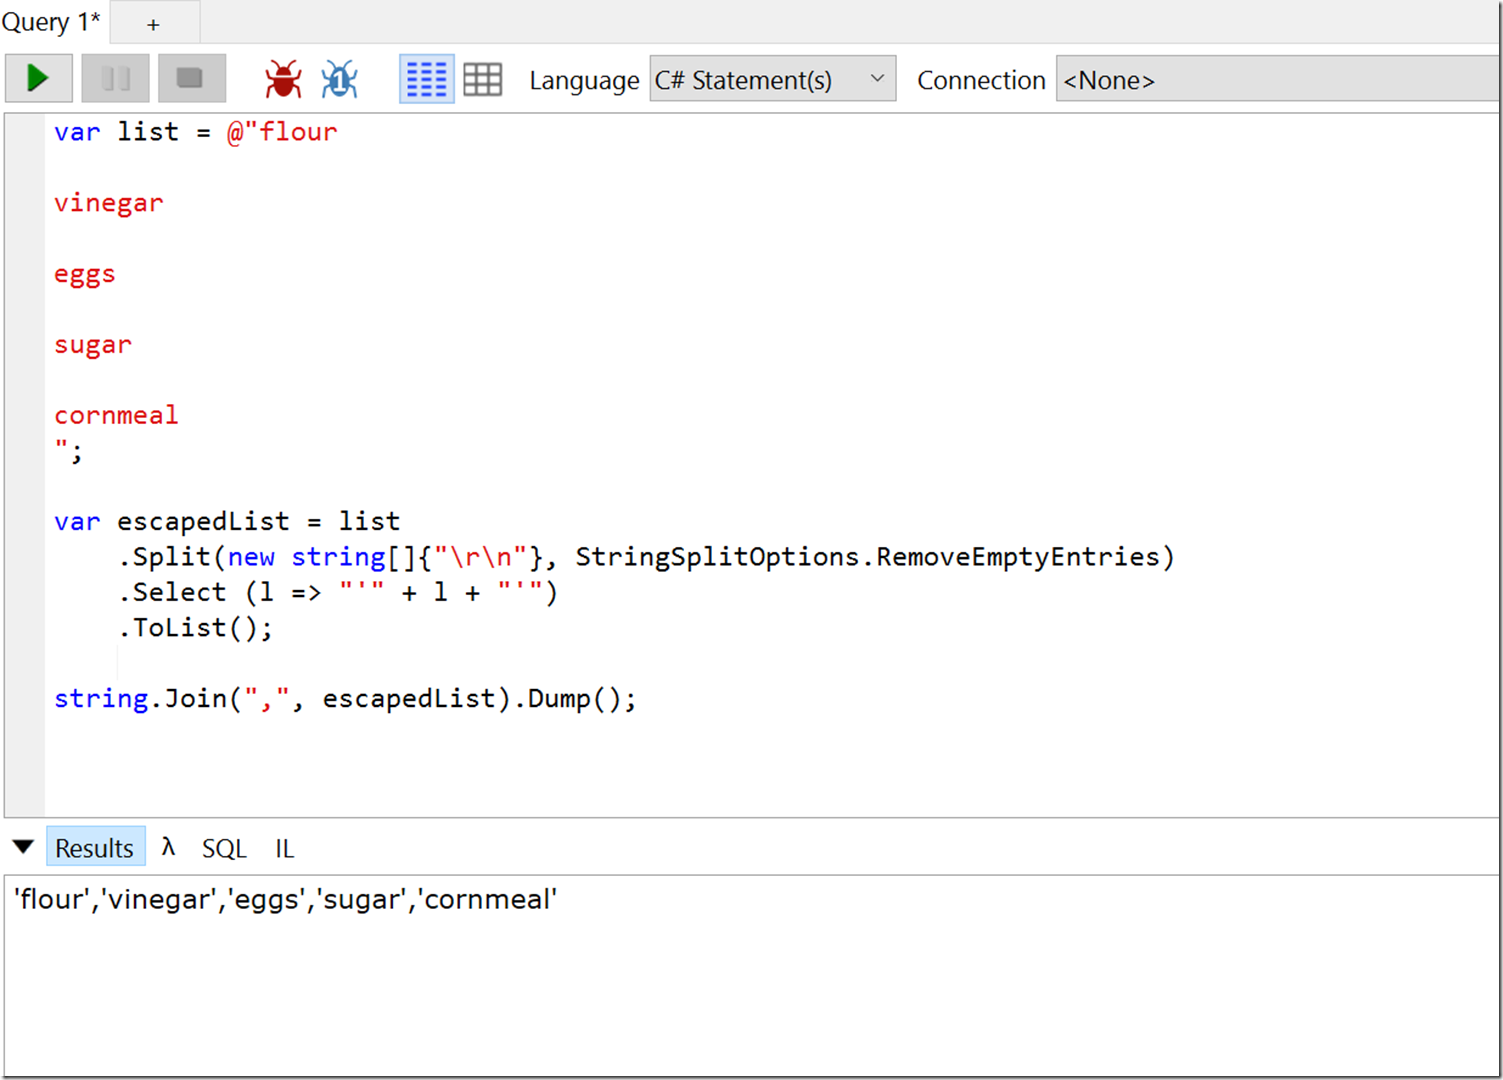
Now I can easily get the values I was given ready for a SQL query.

StringToSQLINQueryRan

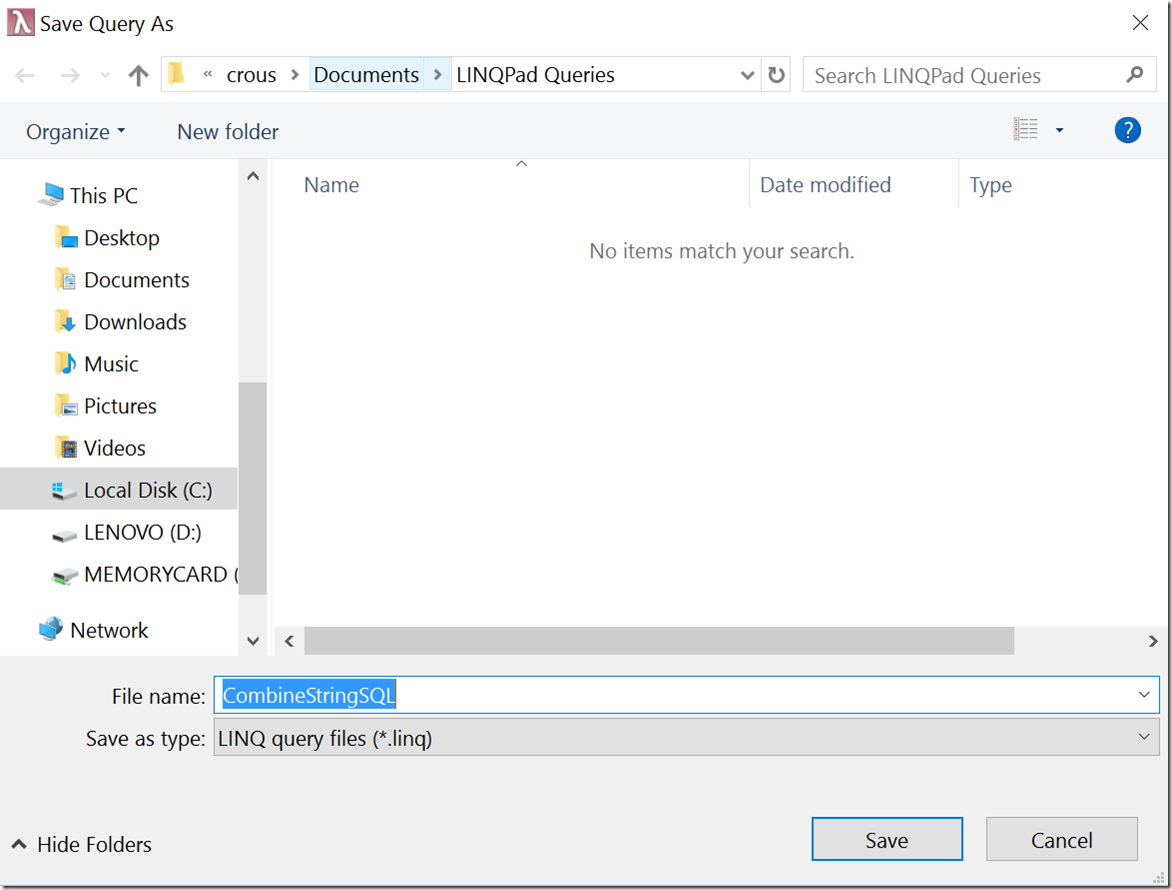
So that I don’t have to write the same code again next time I will save it to my LINQPad queries folder.

StringToSQLINQuerySave

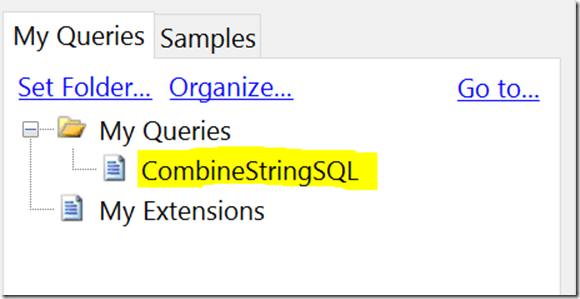
Now I can access that same code again next time easily.

StringToSQLINQuerySavedQueries

That’s all I have to do and I have a quick and easy way to do something repetitive. LINQPad is a great utility for small coding tasks.

0 Comments

While creating a health check page for a service I realized that I was repeating code that timed each health check method. On the health check page there are several methods and each is responsible for checking one thing. The methods all return the same object which is defined by this class:

public class HealthStatus
{
public bool Status { get; set; }
public long RequestTimeMs { get; set; }
public string ErrorMessage { get; set; }
//other properties
}

I decided to refactor the code so that I was not repeating the same code over and over. The style of programming I have been learning from functional programming gave me an idea of how to refactor the code in a much simpler way than I would have without using a functional approach. I created this method which takes a method, starts a timer, runs the method, then puts the time it took to run in the return value.

public HealthStatus TimedHealthCheck(Func<HealthStatus> f)
{
var sw = new Stopwatch();
sw.Start();

var result = f();

result.RequestTimeMs = sw.ElapsedMilliseconds;

return result;
}

Now I can just wrap the work inside my health check methods with this and it will do the timing for me. Here is an example:

public HealthStatus CanParseString()
{
return TimedHealthCheck(() =>
{
var health = new HealthStatus
{
Status = false
};

try
{
var parseInt = 0;
health.Status = int.TryParse("123", out parseInt);
}
catch (Exception ex)
{
health.ErrorMessage = ex.Message;
}

return health;
});
}

To run the health checks I create a list and add each health check:

var healthChecks = new List<HealthStatus>();
healthChecks.Add(CanParseString());

0 Comments

I wanted to be able to publish events from my SmartThings devices to Azure Event Hub. Once I am publishing the events to Event Hub I will be able to save the data or take actions in real time based on the incoming data. In this post I will walk through setting up and Event Hub in Azure and publishing events to it using a Smart App that I will write. 

Creating an Azure Event Hub

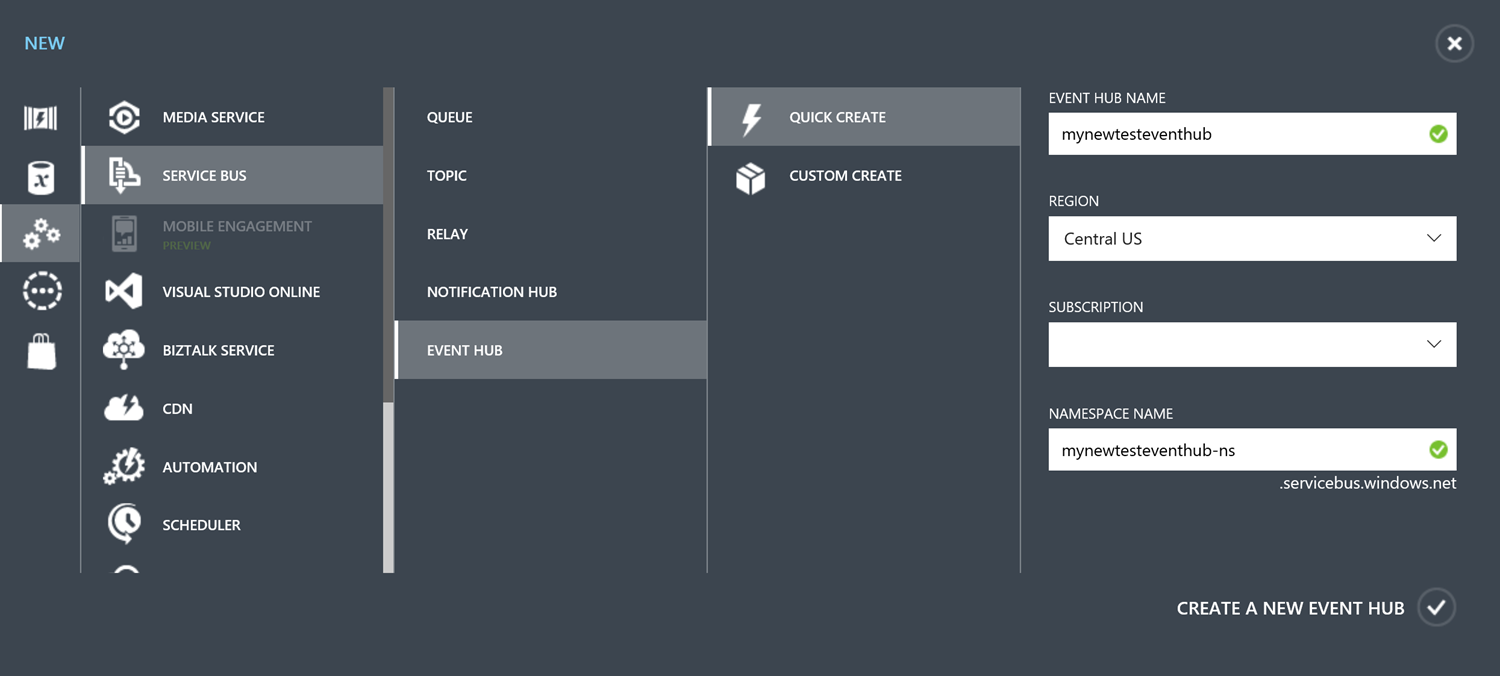
To set up your Event Hub in Azure go to the Azure Management Portal and click the new button at the bottom. Then click on App Services, Service Bus, Event Hub, Quick Create.

EventHubCreate_thumb7

This will create an Event Hub under the Service Bus Section in the Portal. You will need the URL to connect to the Event Hub and you will need to set up access rules. You will also need to create an SAS token to access the Event Hub from the SmartThings App. See my previous post for details on how to do this.

Creating a SmartThings App

Log in to the SmartThings Developer site and click the green New SmartApp button.

Fill in the required fields. In the Settings section create EventHubSecret and EventHubURL settings. Put your SAS token and your Event Hub URL in these.

smartappsettings_thumb5

Click Create and you will be taken to the web IDE for the SmartApp.

Register for events from your devices

The first section of the app is the definition. These settings are populated by what you entered while creating the app.

The next section is the preferences section. This is where you tell SmartThings which sensors you wish to use in your app and you can specify names for them. I have several sensors I will use so I have set it up for power, light, motion, etc. You can also group related sensors by using a Section.

preferences {
section("Power Meter") {
input "powers", "capability.powerMeter", title: "Power Sensor", multiple: true
}
section("Environment") {
input "temperatures", "capability.temperatureMeasurement", title: "Temperature Sensors", multiple: true
input "lightMeters", "capability.illuminanceMeasurement", title: "Light Sensors", multiple: true
input "humidityMeters", "capability.relativeHumidityMeasurement", title: "Humidity Sensors", multiple: true
}
section("Security Sensors") {
input "motions", "capability.motionSensor", title: "Motion Sensors", multiple: true
input "contacts", "capability.contactSensor", title: "Contact Sensors", multiple: true
}
}

In the initialize section you can subscribe to events from your devices.

def initialize() {
subscribe(powers, "power", powerHandler)
subscribe(temperatures, "temperature", temperatureHandler)
subscribe(motions, "motion", motionHandler)
subscribe(contacts, "contact", contactHandler)
subscribe(lightMeters, "illuminance", illuminanceHandler)
subscribe(humidityMeters, "humidity", humidityHandler)
}

Sending events to the Event Hub

The next thing that we need to do is to create the method that will send data to the Event Hub. Data will be sent to the Event Hub with a POST to the Event Hub URL. SmartThings does this with the httpPost method. This method takes an object that contains the parameters for the post.

The url is the Event Hub URL. The body will be a json object containing the data about the event. You can send any data you want in the body. I am sending the sensor ID, name, type, and the value of the sensor. The content type and the request content type must be defined because the Event Hub returns a different content type than the body content type. Finally, the Authorization header must be set using the SAS token that was created for the Event Hub.

def sendEvent(sensorId, sensorName, sensorType, value) {
log.debug "sending ${sensorId} at ${value}"
def cleanedSensorId = sensorId.replace(" ", "")
def params = [
uri: "${appSettings.EventHubURL}",
body: "{ sensorId : \"${cleanedSensorId}\", sensorName : \"${sensorName}\", sensorType : \"${sensorType}\", value : \"${value}\" }",
contentType: "application/xml; charset=utf-8",
requestContentType: "application/atom+xml;type=entry;charset=utf-8",
headers: ["Authorization": "${appSettings.EventHubSecret}"],
]

try {
httpPost(params) { resp ->
log.debug "response message ${resp}"
}
} catch (e) {
//seems to think 201 is an error
//log.error "something went wrong: $e"
}
}

The Event Hub returns a 201 Created http status code. This causes an exception to be thrown. The error log is commented out for this reason, but while getting the app running it may be beneficial to uncomment it.


The final step is to create the event handlers that will use this method to send data to the event hub. For events that have a numeric value such as the power meter I am just sending the value directly to the event hub.

def powerHandler(evt) {
sendEvent('powerMeter', evt.displayName, 'power', evt.value)
}

For the events that contain a text value I am converting it for easier processing later.

def motionHandler(evt) {
if (evt.value == 'active') {
sendEvent(evt.displayName + 'motion', evt.displayName, 'motion', 'motion detected')
}
if (evt.value == 'inactive') {
sendEvent(evt.displayName + 'motion', evt.displayName, 'motion', 'no motion detected')
}
}

Here is the code for all of my event handlers:

def powerHandler(evt) {
sendEvent('powerMeter', evt.displayName, 'power', evt.value)
}

def temperatureHandler(evt) {
sendEvent(evt.displayName + 'temp', evt.displayName, 'temperature', evt.value)
}

def motionHandler(evt) {
if (evt.value == 'active') {
sendEvent(evt.displayName + 'motion', evt.displayName, 'motion', 'motion detected')
}
if (evt.value == 'inactive') {
sendEvent(evt.displayName + 'motion', evt.displayName, 'motion', 'no motion detected')
}
}

def contactHandler(evt) {
if (evt.value == 'open') {
sendEvent(evt.displayName + 'contact', evt.displayName, 'doorOpen', 'open')
}
if (evt.value == 'closed') {
sendEvent(evt.displayName + 'contact', evt.displayName, 'doorOpen', 'open')
}
}

def illuminanceHandler(evt) {
sendEvent(evt.displayName + 'light', evt.displayName, 'lumens', evt.value)
}

def humidityHandler(evt) {
sendEvent(evt.displayName + 'humidity', evt.displayName, 'humidity', evt.value)
}

Run the app and verify it is working

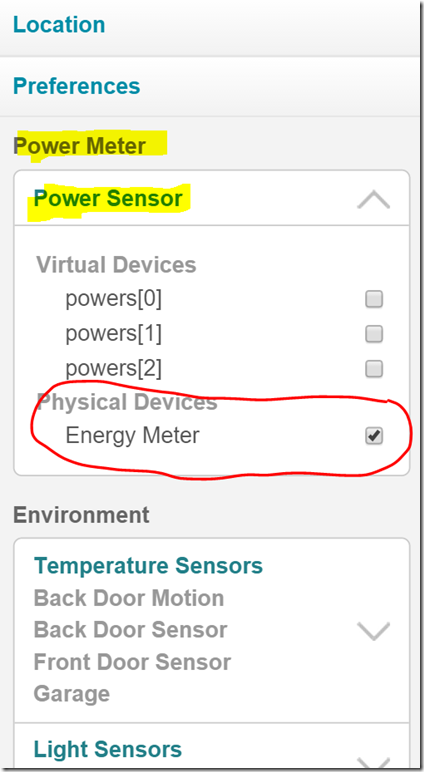
Everything is ready to run now. On the right side of the SmartApp IDE click Set Location and then set your sensors.

SmartAppSensors_thumb1

The headings and labels created in the SmartApp preferences will be shown. Each section will have virtual devices that can be controlled in the IDE for testing. I am just using my physical devices here.

After setting your sensors click on the Install button below the sensor settings. You should now be able to see log statements as events are sent.

Let the app run for at least 30 minutes and then check the Event Hub’s Dashboard in the Azure Management Portal. You should see a graph indicating that events are coming in and everything is working correctly.

EventHubDash_thumb1